Connect to TracsConnect
Once your booking fields are in place, the rest of the setup happens in your TracsConnect dashboard.
Before you start
Section titled “Before you start”You should have:
- A Setmore Pro account
- The custom booking-form fields added (see the previous page)
- Setmore connection access approved (email confirmation from api@setmore.com)
- Your Setmore access key in hand (Setmore emails this to you after approval)
- Your public Setmore booking page URL
Step 1: Get your access key from Setmore
Section titled “Step 1: Get your access key from Setmore”Email api@setmore.com asking for connection access. Setmore will reply (usually within a few business days) with a long string of letters and numbers — this is your access key.
Keep this email. Once you paste the key into TracsConnect, you can close the email — but if you ever need to reconnect, you’ll need it again.
Step 2: Open the Setmore integration in TracsConnect
Section titled “Step 2: Open the Setmore integration in TracsConnect”Sign in to your dashboard, click Integrations in the sidebar, and find the Setmore card.
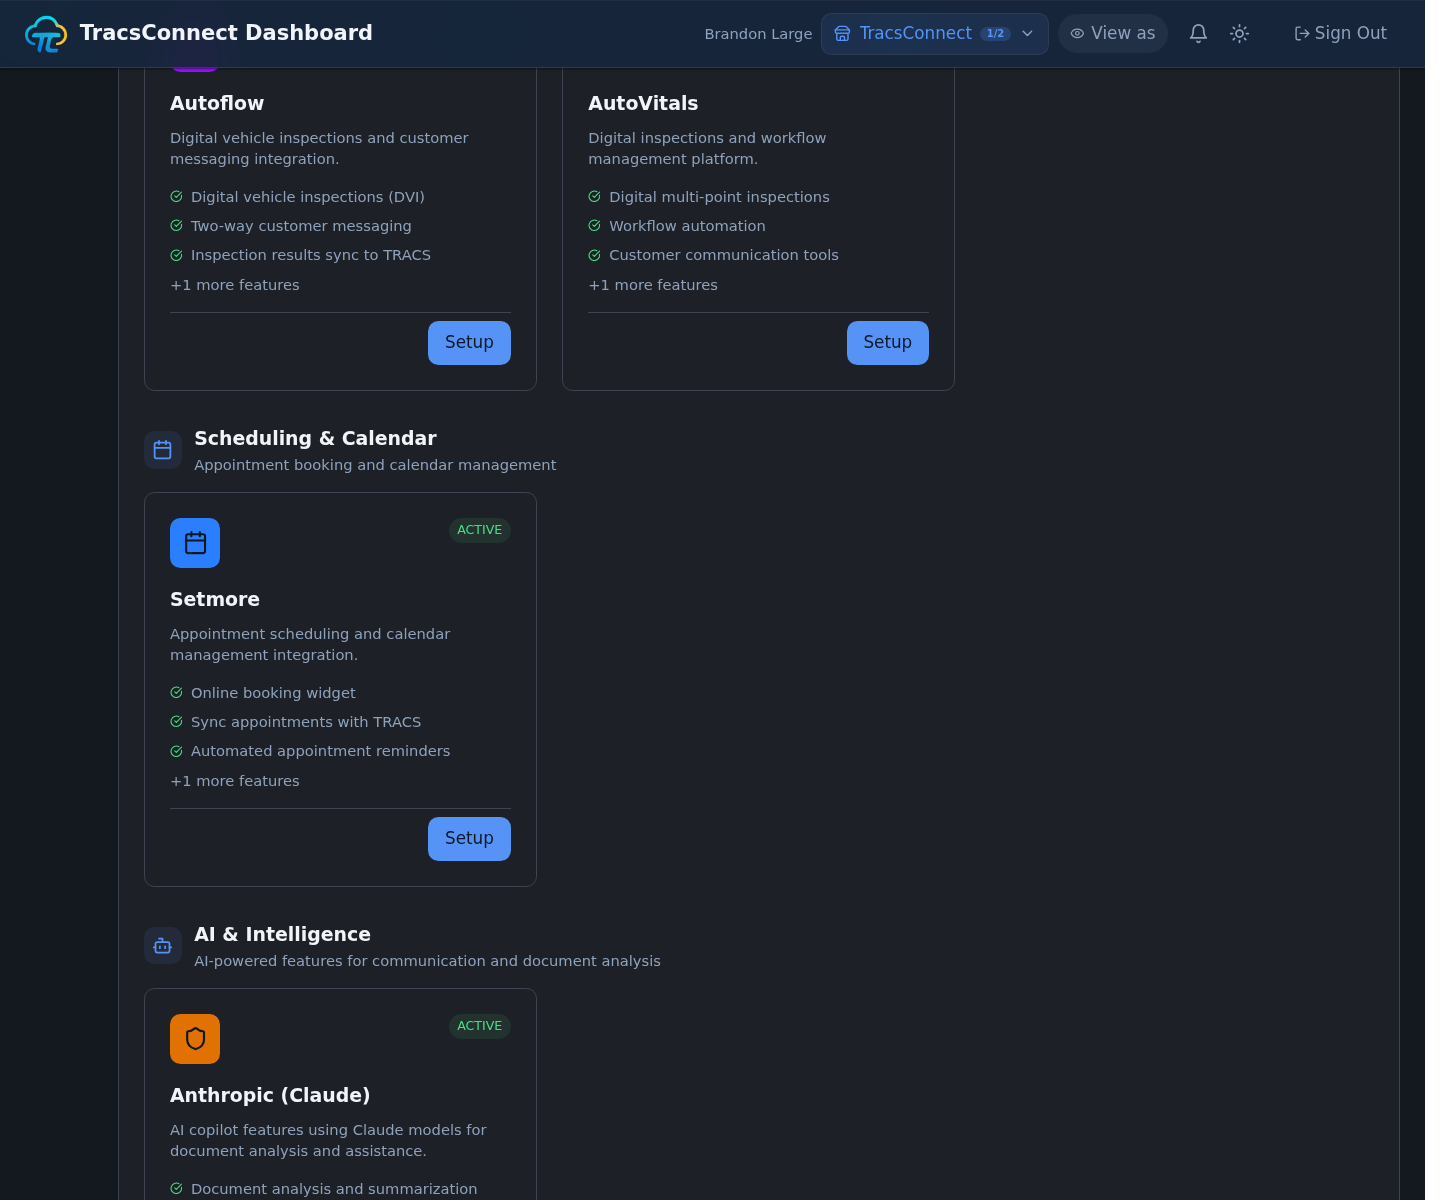
Click Setup on the Setmore card. A setup window opens.
Step 3: Paste your access key and booking page
Section titled “Step 3: Paste your access key and booking page”Paste the access key into the Access Key field. TracsConnect stores it securely — you won’t be able to see it again after you save.
Paste your customer-facing Setmore page into Setmore Booking Page URL. This is the link customers use to book with your shop.
Step 4: Confirm your field labels
Section titled “Step 4: Confirm your field labels”If you used the exact field names from the Custom Contact Fields page, you can skip this step.
If you used different names, use the Vehicle field mapping panel in the setup window and tell TracsConnect what you called each field.
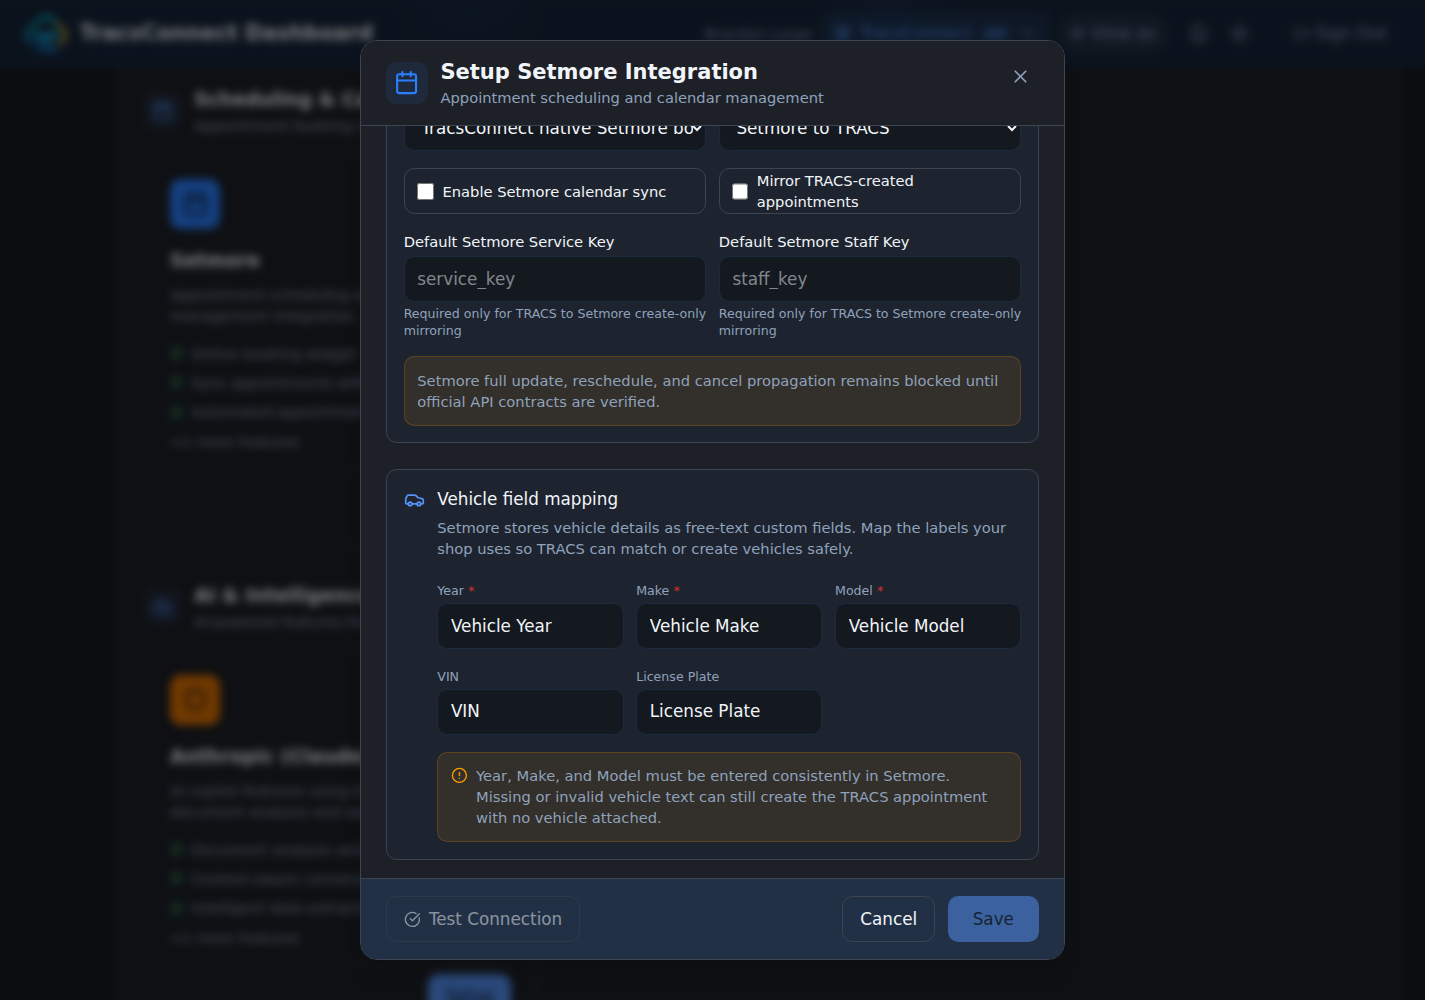
Step 5: Test the connection
Section titled “Step 5: Test the connection”Click Test connection. TracsConnect reaches out to Setmore and confirms everything is working.

If you see a red error, jump to Troubleshoot.
Step 6: Choose sync and save
Section titled “Step 6: Choose sync and save”Choose the booking UI and sync direction your shop wants. Most shops should start with Setmore to TRACS.
Turn on Enable Setmore calendar sync if this shop should participate in Setmore calendar reconciliation. If you leave it off, TracsConnect stores the connection but skips Setmore sync work until you turn it on later.
Click Save at the bottom of the setup window.
Step 7: Run a dry sync, then sync appointments
Section titled “Step 7: Run a dry sync, then sync appointments”After saving, open the Setmore connection again. Use Manual appointment sync to choose a start and end date. Keep Dry run checked first so TracsConnect can check matching without creating TRACS records.
If the dry run looks right, uncheck Dry run and click Sync Appointments. Keep the first window small, then expand after you trust the results.
What happens next
Section titled “What happens next”When you sync a Setmore appointment:
- It shows up on your TRACS schedule
- The customer is created or matched, using phone first and safer fallback signals when phone is not usable
- The vehicle is matched or created from the booking-form fields when Year, Make, and Model are usable
- The appointment is ready to become a work order when the customer arrives