
Connect to TracsConnect
Connecting Voxtelesys takes about five minutes. You create an access key in the Voxtelesys Portal, paste it into your TracsConnect dashboard, and run a test.
Before you start
Section titled “Before you start”You should have:
- A Voxtelesys account with an SMS-enabled phone number
- Your sign-in for the Voxtelesys Portal (portal.voxtelesys.net)
- Your Voxtelesys phone number in E.164 format (e.g. +15551234567) — find it in the portal under your number list
Step 1: Create an access key in the Voxtelesys Portal
Section titled “Step 1: Create an access key in the Voxtelesys Portal”-
Open portal.voxtelesys.net and sign in.
-
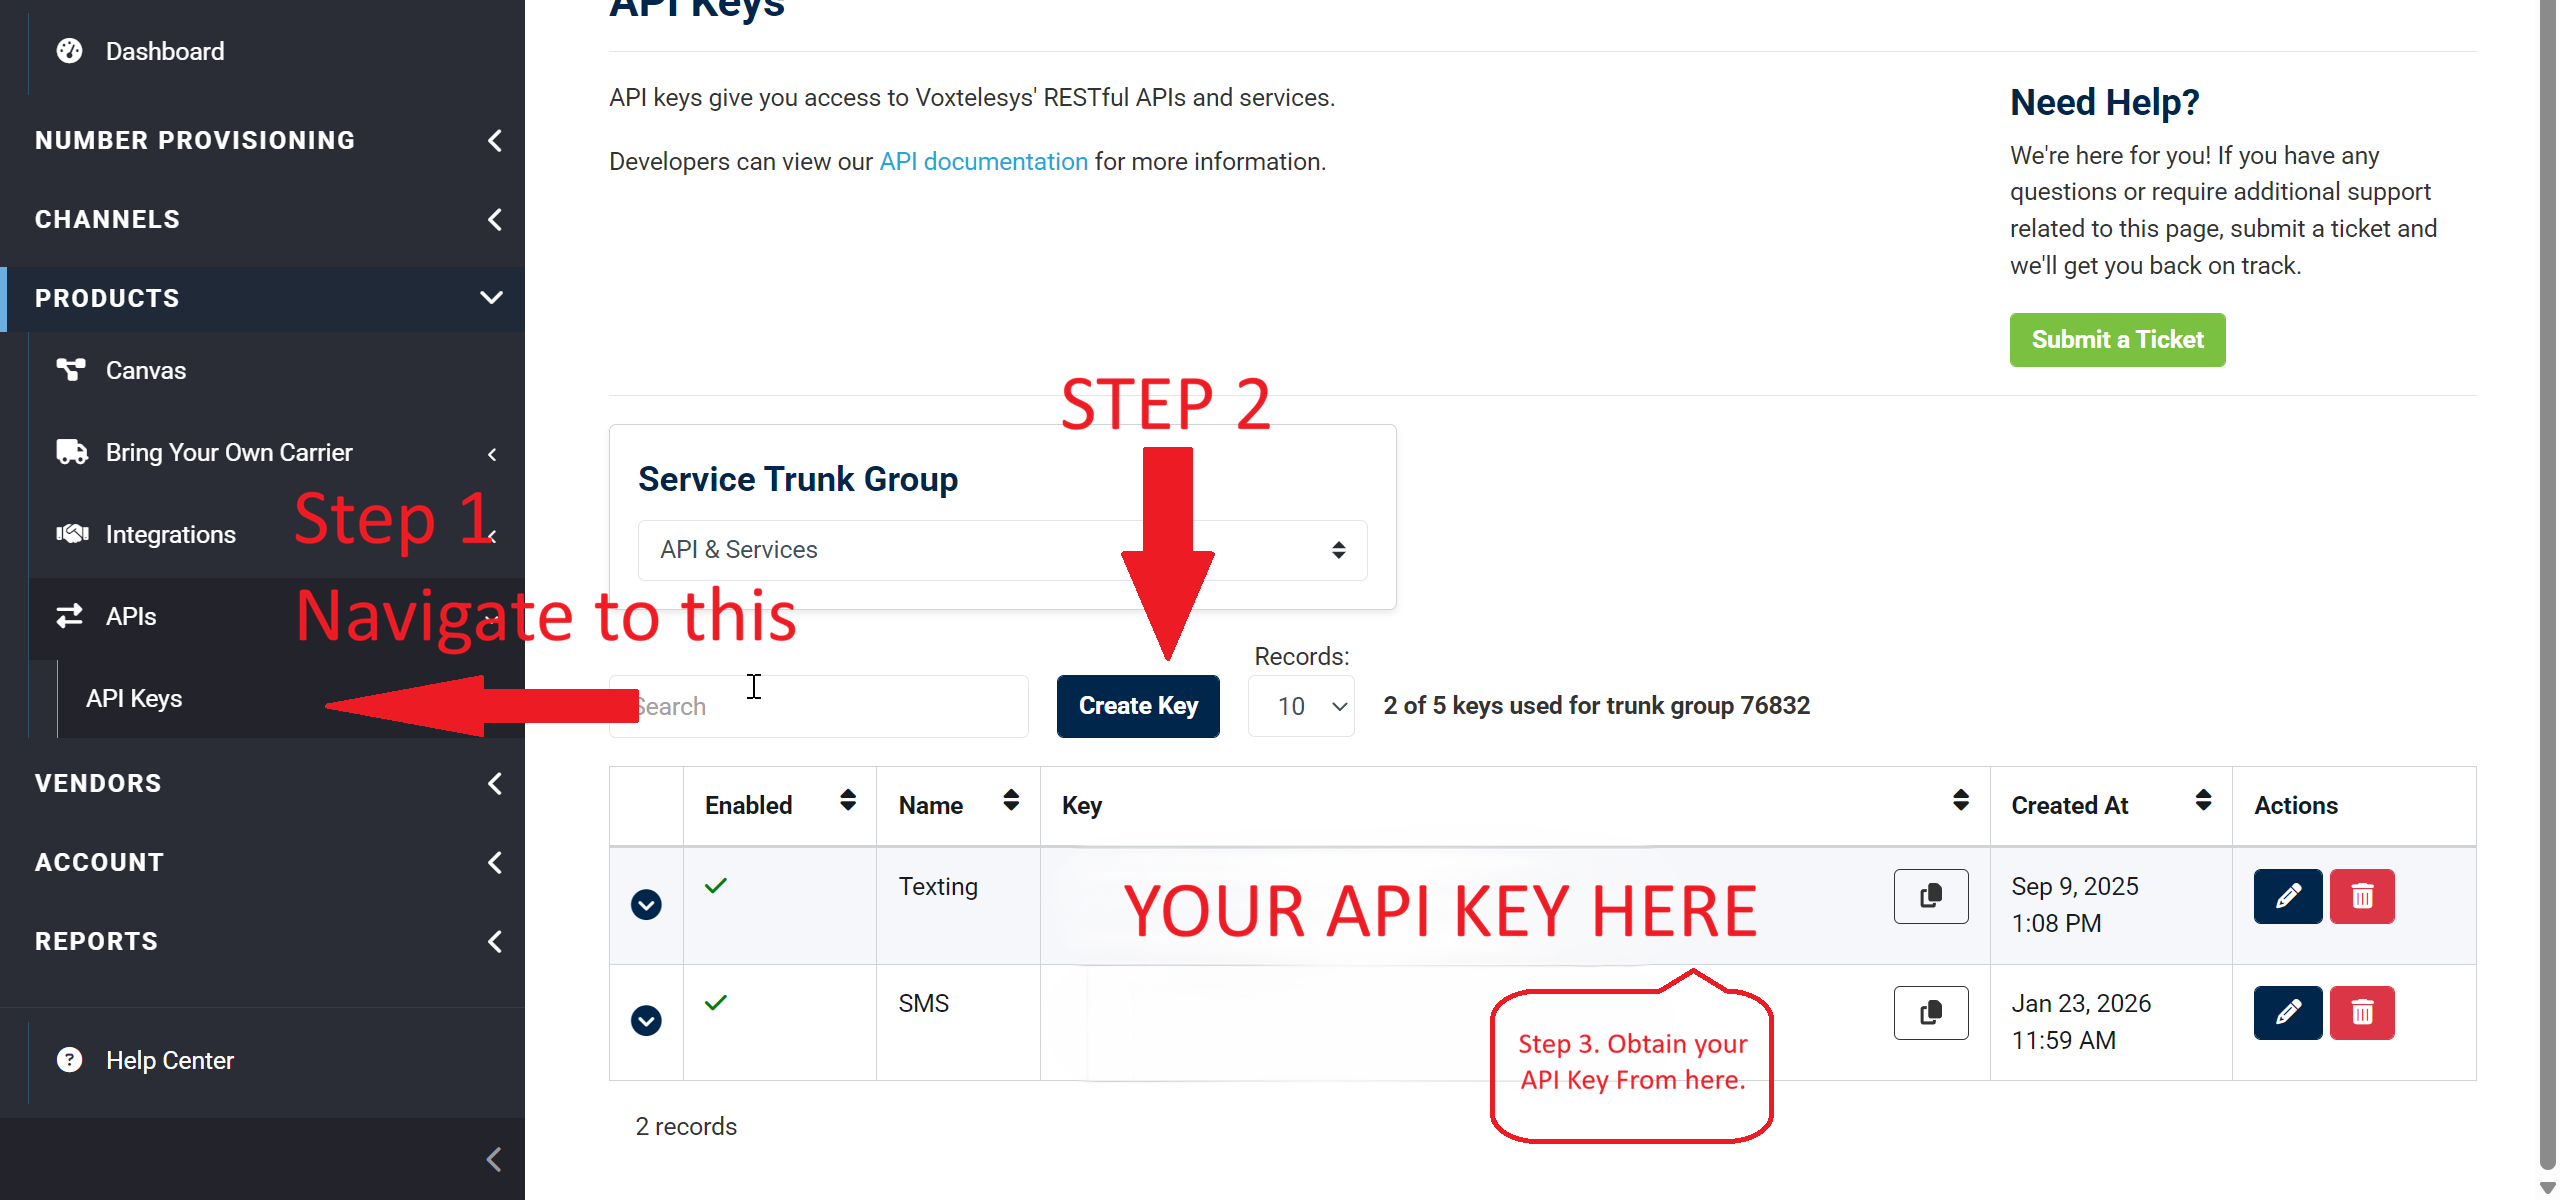
In the left sidebar, go to Products → APIs → API Keys.
-
In the Service Trunk Group dropdown, choose API & Services.
-
Click Create Key. The portal generates a new key and shows it in the key table.
-
Copy the key value. This is your access key — keep it somewhere safe for the next step.
Step 2: Open the Voxtelesys integration in TracsConnect
Section titled “Step 2: Open the Voxtelesys integration in TracsConnect”Sign in to your dashboard, click Integrations in the sidebar, and find the Voxtelesys card on the Available Integrations tab.
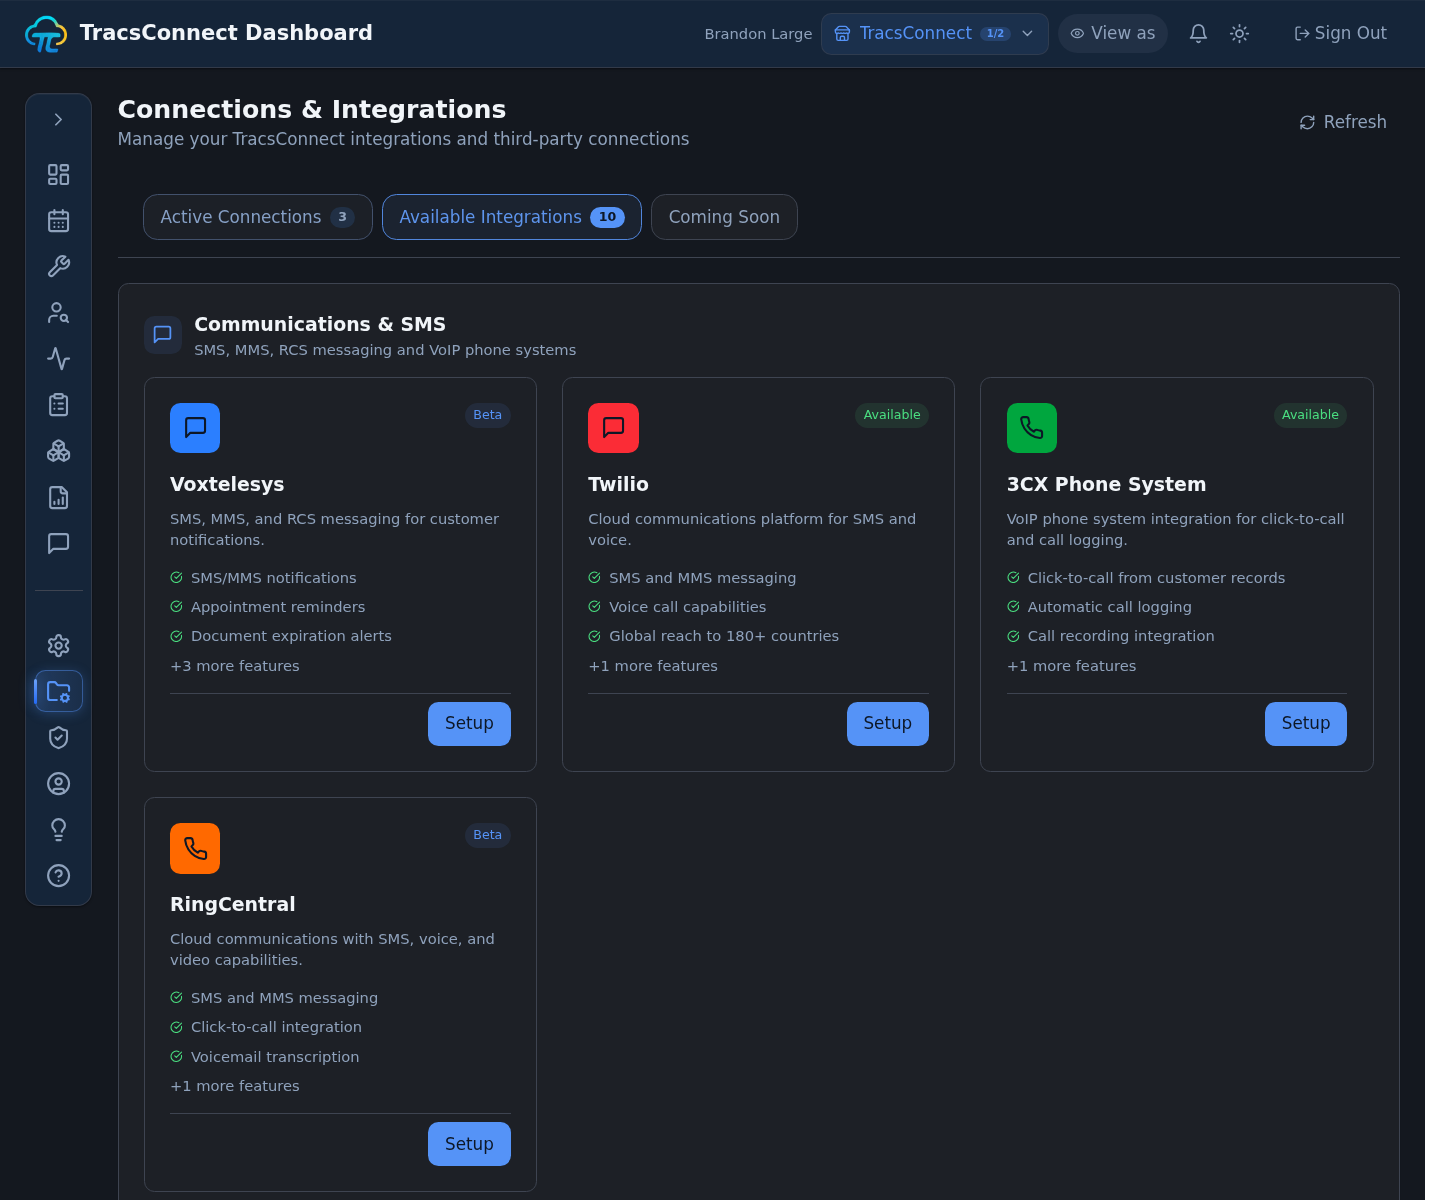
Click the Voxtelesys card. A setup window opens.
Step 3: Paste your access key and sending number
Section titled “Step 3: Paste your access key and sending number”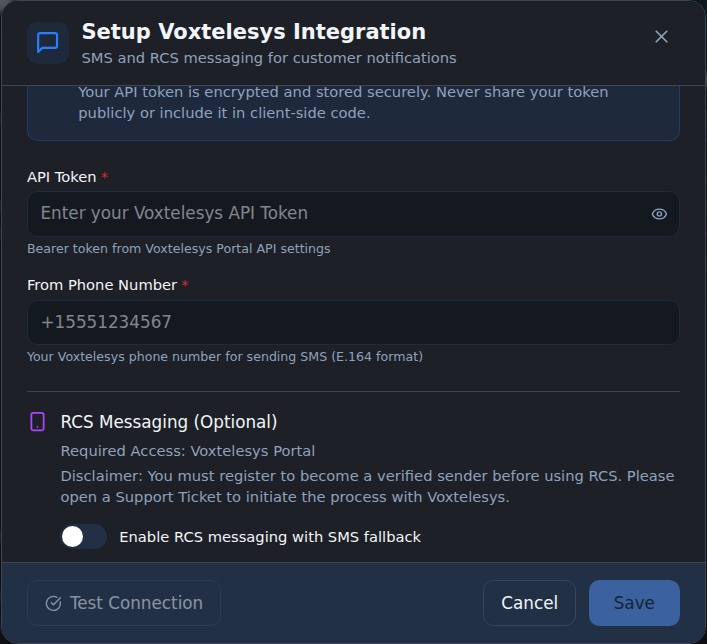
Fill in the two required fields:
- API Token — paste the access key you copied from the Voxtelesys Portal.
- From Phone Number — your Voxtelesys SMS-enabled number, in E.164 format (e.g.
+15551234567). This is the number customers will see when they get a message from your shop.
TracsConnect stores both values securely. After you save, the access key is masked — you won’t be able to read it back. If you ever need to rotate it, just paste a new key.
Step 4: Decide on RCS (optional)
Section titled “Step 4: Decide on RCS (optional)”If you want RCS messaging (richer messages with your shop’s brand name), flip the Enable RCS messaging with SMS fallback switch and follow the RCS setup page.
If you’re not sure, leave RCS off for now — you can enable it later. Plain SMS will work either way.
Step 5: Test the connection
Section titled “Step 5: Test the connection”Click Test Connection. TracsConnect reaches out to Voxtelesys and confirms your access key is valid.
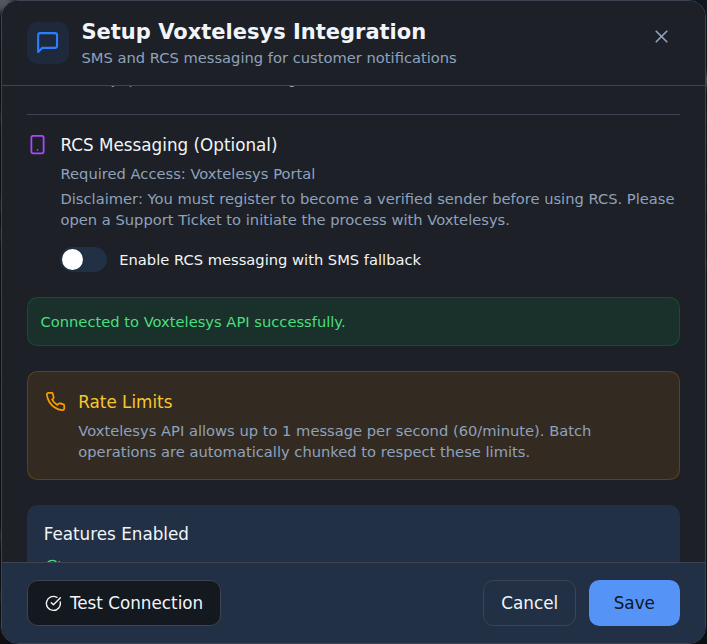
If you see a red error instead of a green check, jump to Troubleshoot.
Step 6: Save
Section titled “Step 6: Save”Click Save at the bottom of the setup window. TracsConnect stores your credentials and the integration goes live.
From now on, any reminder or alert your dashboard sends will go through Voxtelesys, using the From number you entered. You don’t need to come back to this screen unless you rotate your access key, change your sending number, or want to turn RCS on or off.
What happens next
Section titled “What happens next”Once Voxtelesys is connected:
- Outbound messages route through your Voxtelesys number automatically — appointment reminders, document alerts, and any manual texts triggered from the dashboard
- Delivery status comes back to TracsConnect within seconds of each send, so the dashboard can show whether a message was delivered, failed, or is still in flight
- Large batches are sent in chunks automatically — TracsConnect sends up to 100 messages at a time with a one-second pause between chunks, so nothing gets rejected for being too fast
Send a test message to your own phone to confirm everything is wired up. If something looks off, the troubleshooting page covers the common cases.