
Connect to TracsConnect
Connecting 3CX takes a few minutes once the 3CX API client exists.
Before you start
Section titled “Before you start”You should have:
- The 3CX FQDN, such as shopname.3cx.us
- The Client ID from the 3CX API client
- The one-time 3CX API key to paste as the Client Secret
- A decision about whether to enable CRM lookup, CDR ingest, or both
If those values are not ready yet, follow 3CX Admin setup first.
Step 1: Open 3CX in TracsConnect
Section titled “Step 1: Open 3CX in TracsConnect”Sign in to your dashboard, click Integrations in the sidebar, and find the 3CX card.
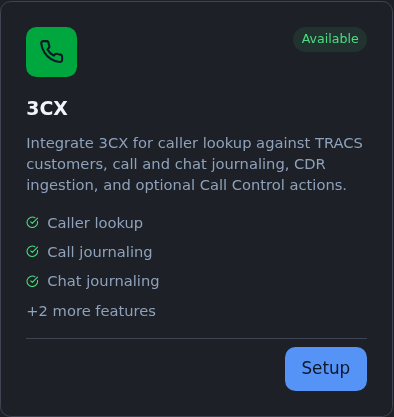
Click Setup. A setup window opens.
Step 2: Enter the 3CX connection details
Section titled “Step 2: Enter the 3CX connection details”Type the 3CX FQDN without a path. https:// is optional.
Paste the Client ID from 3CX.
Paste the 3CX API key into Client Secret. TracsConnect stores secret values securely and masks them after saving.
Step 3: Choose the enabled surfaces
Section titled “Step 3: Choose the enabled surfaces”Leave CRM lookup on if 3CX should look up TRACS customers during calls.
Leave CDR ingest on only if your shop has a receiver or bridge that will send CDR records to TracsConnect.
Step 4: Test the connection
Section titled “Step 4: Test the connection”Click Test connection. TracsConnect signs in to 3CX and confirms the client details work.
If you see a red error, jump to Troubleshoot.
Step 5: Save the setup
Section titled “Step 5: Save the setup”Click Save at the bottom of the setup window.
After saving, TracsConnect shows callback values and secrets for the surfaces you enabled.
Step 6: Install the CRM template in 3CX
Section titled “Step 6: Install the CRM template in 3CX”In TracsConnect, open Settings > Telephony for the same shop and download the 3CX CRM template.
In the 3CX Admin Console, open Settings > CRM > Server side, upload the downloaded template, and paste the generated CRM secret when 3CX asks for it.
Use the 3CX template test with a known TRACS customer phone number before relying on live calls.
Step 7: Enable caller ID surfaces per shop
Section titled “Step 7: Enable caller ID surfaces per shop”In TracsConnect Settings > Telephony:
- Keep Caller ID Popup on if service advisors should see the dashboard pop during inbound calls.
- Turn on Windows Toasts only for shops that want OS-level workstation notifications on registered Client Monitor stations. This toggle defaults off.
3CX-native caller ID comes from the CRM template lookup. Dashboard popups and Windows toasts are controlled independently in TracsConnect.
Step 8: Copy any remaining callback values into 3CX
Section titled “Step 8: Copy any remaining callback values into 3CX”Copy the generated values into the matching 3CX setup:
- Use the lookup value in the 3CX CRM template contact lookup action.
- Use the journal value in the 3CX CRM template call journal action.
- Use the CDR value only with the CDR receiver or bridge your shop has chosen.
- Store the CRM and CDR secrets before closing the setup window.
What happens next
Section titled “What happens next”Run a controlled inbound-call test with a known TRACS customer phone number. Confirm the customer lookup appears in 3CX, the dashboard popup shows the caller, and the Windows toast appears only if the shop enabled it.