
Connect to TracsConnect
Use this guide when your rollout contact has approved your shop for the Mailchimp beta.
Before you start
- Your shop is included in the Mailchimp beta rollout
- You can sign in to the Mailchimp account that owns the audience
- The Mailchimp audience already exists
- TRACS email consent is reviewed for the customers you plan to sync
- You know whether new Mailchimp contacts should start as pending opt-in or subscribed
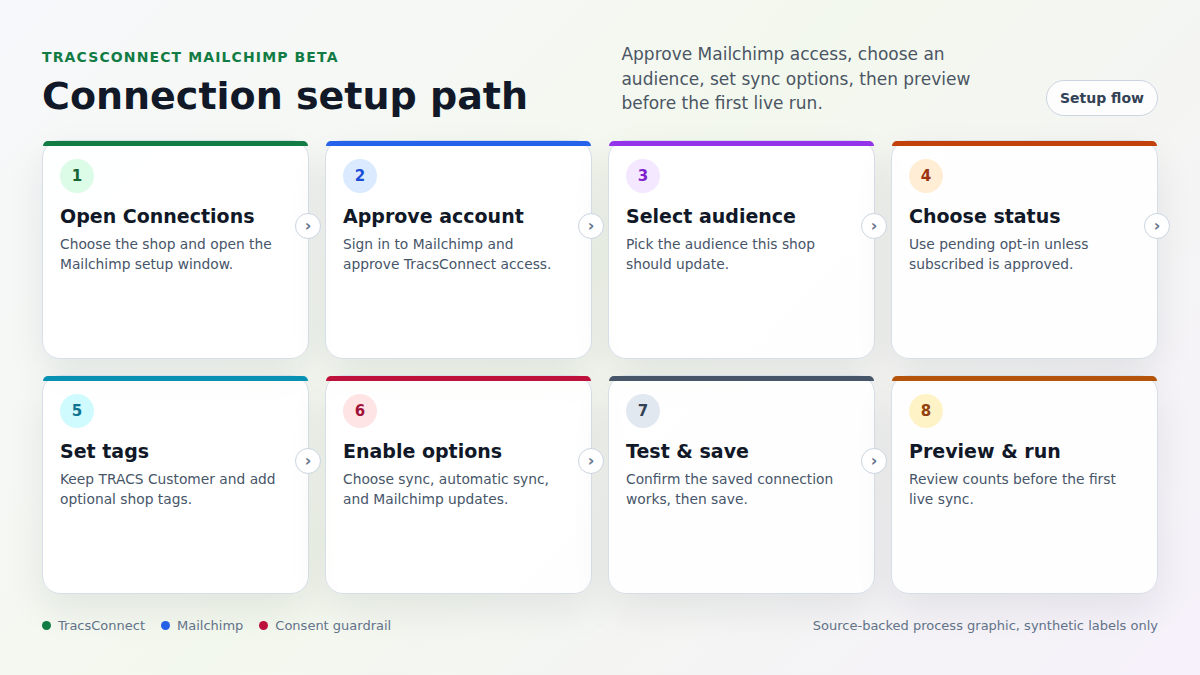
Step 1: Open the Mailchimp setup window
Section titled “Step 1: Open the Mailchimp setup window”In TracsConnect
- Sign in to your TracsConnect dashboard.
- Choose the shop you want to connect.
- Click Connections in the sidebar.
- Find Mailchimp.
- Click Connect.
Step 2: Approve the Mailchimp connection
Section titled “Step 2: Approve the Mailchimp connection”In Mailchimp
- Click Connect in the Mailchimp setup window.
- Sign in to Mailchimp when prompted.
- Approve TracsConnect access for the Mailchimp account.
- Return to the TracsConnect setup window after approval completes.
Step 3: Choose the Mailchimp audience
Section titled “Step 3: Choose the Mailchimp audience”In TracsConnect
- Open the Audience list.
- Choose the Mailchimp audience this shop should update.
- Confirm the audience member count looks like the audience you expected.
TracsConnect syncs each shop to the audience you select here. Do not choose a shared audience unless your rollout plan says that audience is correct.
Step 4: Choose the new-contact status
Section titled “Step 4: Choose the new-contact status”- Open New Contact Status.
- Choose Pending opt-in when Mailchimp should ask new contacts to confirm before marketing email is sent.
- Choose Subscribed only when your shop has already confirmed the customer can receive marketing email.
Most shops should start with Pending opt-in during beta.
Step 5: Review tags
Section titled “Step 5: Review tags”- Leave TRACS Customer in the tag list.
- Add any extra tags your shop wants Mailchimp to apply.
- Separate multiple tags with commas.
TracsConnect always adds TRACS Customer. Extra tags help you segment synced customers inside Mailchimp.
Step 6: Choose sync options
Section titled “Step 6: Choose sync options”- Turn on Enable sync when the shop is ready for TracsConnect to update Mailchimp.
- Turn on Automatic sync only after the first preview and live run look right.
- Leave Mailchimp updates enabled unless support tells you otherwise.
Mailchimp updates help TracsConnect remember contacts who unsubscribe or are marked cleaned in Mailchimp.
Step 7: Test and save
Section titled “Step 7: Test and save”- Click Test.
- Confirm the test message says the saved connection is working.
- Click Save.
Step 8: Preview before the first live sync
Section titled “Step 8: Preview before the first live sync”- Set a Sync Limit for the first pass.
- Click Preview.
- Review the Selected, Eligible, and Skipped counts.
- Look for unexpected contact counts before continuing.
- Click Run Sync only when the preview looks right.
Start small during beta. Increase the limit only after you trust the preview and live results.