
Set up Native Booking
Use this guide when TracsConnect should handle the shop’s customer booking flow.
Before you start
- The shop code is set
- The shop time zone is set in Settings > Shop
- Business hours are set in Calendar > Shop Hours
- You know which services customers should be able to book online
- You know which services allow waiters, drop-offs, or advisor review
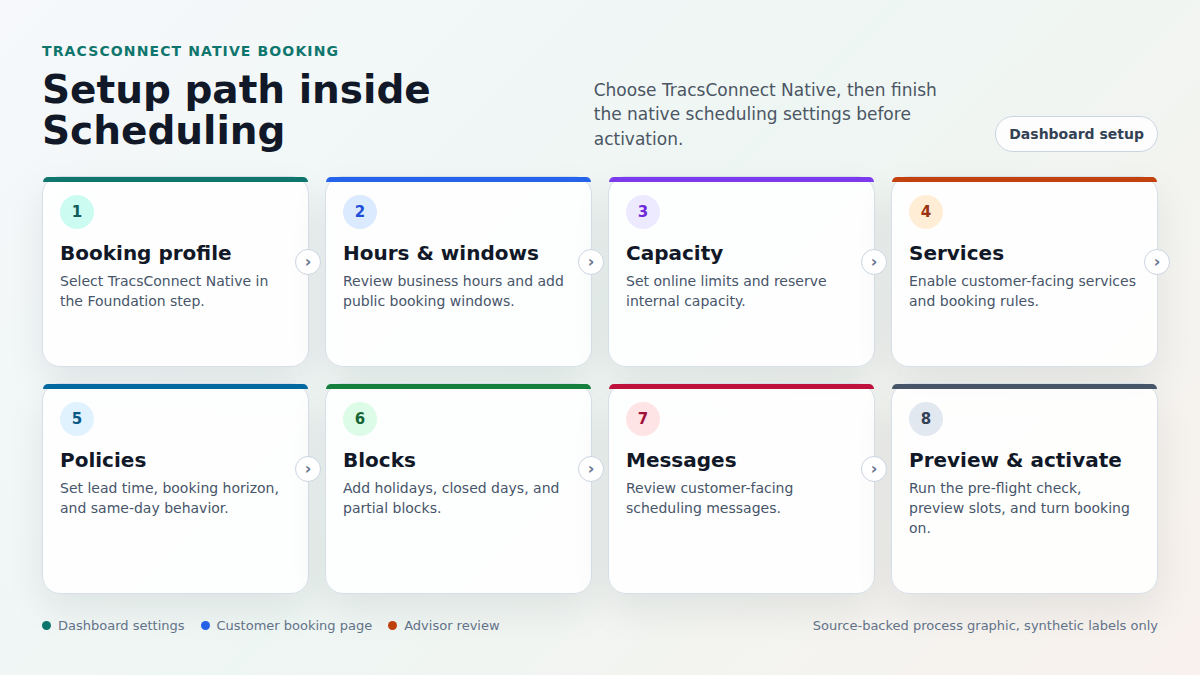
Step 1: Open Scheduling
Section titled “Step 1: Open Scheduling”- Sign in to your dashboard.
- Choose the shop you want to configure.
- Click Scheduling in the sidebar.
- Start in the Foundation step.
Step 2: Choose TracsConnect Native
Section titled “Step 2: Choose TracsConnect Native”- Find Booking Profile.
- Choose TracsConnect Native.
- Save the change.
When AutoOps or Setmore is selected instead, the native hours, services, and policy steps are hidden because that provider owns the customer booking experience.
Step 3: Confirm hours and booking windows
Section titled “Step 3: Confirm hours and booking windows”- Review Business Hours.
- Go to Calendar > Shop Hours if the hours look wrong.
- Choose the slot interval customers should see.
- Add public booking windows for each day customers may book online.
- Leave a day empty when customers should not book online that day.
- Save the change.
Business hours are your operating schedule. Public booking windows are the parts of that schedule you open for online booking.
Step 4: Set capacity
Section titled “Step 4: Set capacity”- Review the capacity fields in Foundation.
- Add the limits your shop wants.
- Leave a field blank when you do not want that limit.
- Use Reserved Internal Capacity to hold back room for phone calls, walk-ins, or advisor-entered appointments.
- Save the change.
Step 5: Add bookable services
Section titled “Step 5: Add bookable services”- Open Services.
- Add a category if you want to group services on the booking page.
- Click Add.
- Pick a TRACS labor or job item.
- Review the customer-facing name and duration.
- Turn on Enabled for online booking.
- Choose the booking mode.
- Choose whether the service allows waiters, drop-offs, or advisor approval.
- Choose which vehicle details are required.
- Save the service.
At least one service must be enabled for online booking before customers can book.
Step 6: Set policies
Section titled “Step 6: Set policies”- Open Lead Time.
- Set the minimum lead time.
- Set the booking horizon.
- Choose the same-day booking behavior.
- Save the change.
These policies keep customers from booking too soon or too far into the future.
Step 7: Add blocks and messages
Section titled “Step 7: Add blocks and messages”- Open Blocks & Holidays.
- Add closed days, holidays, or partial blocks when needed.
- Open Notifications.
- Review the customer messages.
- Update any message your shop wants to personalize.
- Save the change.
Step 8: Preview and activate
Section titled “Step 8: Preview and activate”- Open Preview.
- Confirm the pre-flight checklist shows every required item as complete.
- Run an availability preview.
- Fix any item that still needs attention.
- Turn on Activate online scheduler when the preview looks right.
Customers can book only after the online scheduler is active.
What happens next
Section titled “What happens next”The customer booking page starts using your native scheduling settings. Customers see the enabled services, available time slots, required details, and confirmation messages that match the setup you just saved.